สมัครเรียนโทร. 085-350-7540 , 084-88-00-255 , ntprintf@gmail.com

Web Programming

ASP.NET ต่างกับ ASP อย่างไร JavaScript - HelloWorld npm - Intro AngularJS - HelloWorld VueJS - HelloWorld webpack - Intro ASP.NET - HelloWorld Flask - HelloWorld Web Server คืออะไร API คืออะไร Maven - HelloWorld Nancy - HelloWorld Protocol คืออะไร วิธีติดตั้ง Web Server บน Ubuntu วิธีติดตั้ง PrestaShop with PHP 8 (ใช้ Amazon Lightsail) วิธีติดตั้ง XAMPP บน Ubuntu 22.04 วิธีติดตั้ง WordPress บน XAMPP บน Ubuntu 22.04 React - Simple Web App - People Counter React - Simple Web App - People Counter 2 React - Web App - Dictionary React - Web App - Multiple Pages React - Web App - Multiple Pages with APIs React - Web App - Calculator React - Web App - Smart Parking วิธีสร้าง AWS EC2 instance สร้าง Web Application โดยใช้ Django และ Deploy บน AWS EC2 React - Create and Run React Application React - Web App - SpO2 Tracker วิธีติดตั้งและใช้งาน CKEditor 5 Introduction to JSON JSON Full Form: JavaScript Object Notation History of JSON JSON vs XML Structure of JSON JSON Data Types JSON Objects Explained JSON Arrays Explained Key-Value Pairs in JSON JSON String Data Type JSON Number Data Type JSON Boolean Data Type JSON Null Data Type Nested JSON Objects JSON in APIs JSON Schema Overview How to Write JSON JSON File Extensions (.json) JSON Syntax Rules JSON Parsing in JavaScript JSON Stringify in JavaScript How to Use JSON.parse() How to Use JSON.stringify() Escaping Characters in JSON JSON Comments (and why they are not allowed) JSON in Web Development Sending JSON Data with HTTP Requests Receiving JSON Responses in APIs REST APIs and JSON JSON in AJAX Requests Working with JSON in Node.js How to Read a JSON File Saving Data in JSON Format How to Validate JSON JSONLint for Validation JSON Pretty Print JSON Minification JSON vs YAML JSON and JavaScript Compatibility JSON and Python Integration Working with JSON in Python (json module) JSON in Java (Jackson and GSON) JSON in C++ (RapidJSON and nlohmann/json) JSON in C# (Json.NET) JSON in PHP (json_encode and json_decode) How to Fetch JSON Data from APIs Fetching JSON in Python (requests module) Fetching JSON in JavaScript (fetch API) Fetching JSON in jQuery JSON Serialization JSON Deserialization JSON Data Interchange Common Errors in JSON Syntax Handling Large JSON Files Streaming JSON Data JSON Pagination Techniques JSON as a Configuration Format JSON in Cloud Storage JSON and MongoDB BSON vs JSON in MongoDB JSON Web Tokens (JWT) Security Considerations with JSON Cross-Origin Resource Sharing (CORS) and JSON JSON Schema Validation Creating a JSON Schema Required Fields in JSON Schema JSON Schema Property Types JSON Schema Examples Benefits of JSON Schema JSONPath: Querying JSON Data JSON Data Transformation Comparing Two JSON Objects Sorting JSON Data Flattening JSON Structures JSON Merge Techniques JSON in NoSQL Databases JSON in Relational Databases Storing JSON in MySQL JSON Functions in MySQL JSON Functions in PostgreSQL JSON Functions in SQL Server JSON and Elasticsearch Advantages of Using JSON Limitations of JSON JSON and GraphQL JSONP (JSON with Padding) JSON and Local Storage in Browsers JSON and Cookies JSON and Session Storage Importing and Exporting JSON Nested vs Flattened JSON Structures JSON Best Practices Debugging JSON Errors JSON Performance Optimization Real-Time Data with JSON Microservices and JSON JSON Versioning JSON in IoT Applications JSON for Data Exchange in Mobile Apps The Future of JSON Introduction to XML XML Full Form: eXtensible Markup Language History of XML XML vs HTML XML vs JSON Structure of XML XML Syntax Rules XML Elements Explained XML Attributes Explained XML Tags XML Prolog XML Declaration XML Namespaces XML Data Types XML Comments XML Empty Elements XML Well-Formed Documents XML Valid Documents XML DTD (Document Type Definition) XML Schema Definition (XSD) XML vs XSD XML vs DTD XML Namespaces Best Practices XML Parsers XML DOM (Document Object Model) SAX Parser in XML XML Parsing in Java XML Parsing in Python XML Parsing in C# XML Parsing in JavaScript XML with PHP How to Read XML Files How to Write XML Files How to Validate XML XML Formatting and Pretty Print XML Minification XML Tree Structure XML as a Data Interchange Format XML in Web Services SOAP and XML REST vs SOAP (XML in APIs) XML in AJAX XMLHTTPRequest in JavaScript XML in Mobile Applications How to Transform XML with XSLT XSLT for Formatting XML XPath Overview XPath Syntax XPath Expressions and Queries XML Query Languages XQuery Overview XLink for XML Linking XPointer for XML Fragment Identification XML for Configuration Files Storing XML in Databases XML in MySQL XML in PostgreSQL XML in SQL Server XML in Oracle Database XML Indexing XML Data Modeling XML and SOAP Faults XML Encryption XML Digital Signatures Security Best Practices for XML XML Schema Elements XML Schema Attributes XML Schema Validation XML Schema Restrictions and Extensions XML Schema Choice and Sequence Benefits of Using XML Limitations of XML XML in Big Data XML and NoSQL Databases XML for IoT Applications XML in E-commerce Systems XML for Document Storage XML for Multimedia Content XML in Content Management Systems XML and Microservices XML and Cloud Computing XML for RSS Feeds Atom and XML Feeds XML in Office Document Formats (DOCX, XLSX) XML and SVG (Scalable Vector Graphics) XML for Vector Graphics XML Compression Techniques XML with WebSockets XML in Real-Time Applications JSON vs XML Performance XML and CORS (Cross-Origin Resource Sharing) XML for API Design Common XML Parsing Errors Debugging XML Converting XML to JSON Converting JSON to XML XML Best Practices XML Versioning XML and GraphQL The Future of XML

A27_HowTo02_Install_WebServer_on_Ubuntu

หลังจากที่ได้แนะนำวิธีลง Ubuntu ไปแล้ว ในบทความนี้ผมจะขอแนะนำวีธีลง LAMP stack เพื่อตั้ง web server บนเครื่อง Ubuntu ซึ่งเป็น Linux ครับ สำหรับใครที่ยังไม่รู้จักว่า Linux คืออะไรสามารถอ่านได้ในบทความ A19_WhatIs03_Linux ถ้ายังไม่ได้ลง Ubuntu สามารถดูวิธีการได้จากบทความ A26_HowTo01_Install_Ubuntu_Desktop

จากนั้นขอให้อ่านบทความ A20_Linux_CommandLine ต่อเพื่อให้รู้จักการใช้งานโปรแกรม Terminal ซึ่งจะเป็นที่สำหรับใส่คำสั่งหรือ Command line ของเราที่จะใช้ในบทความนี้ครับ

LAMP Stack คืออะไร

LAMP stack เป็นกลุ่มของ open-source software ที่มักจะใช้ติดตั้งเพื่อทำ web server คำว่า LAMP มาจาก Linux, Apache, MySQL และ PHP หากขยายความก็คือคอมพิวเตอร์ที่มีระบบปฏิบัติการเป็น Linux ติดตั้ง web server Apache เก็บข้อมูลของเว็บใน MySQL และ dynamic content ต่าง ๆ ดำเนินการด้วย PHP นั้นเอง

มาติดตั้ง LAMP กันเถอะ

หลังจากรู้จักกับ LAMP stack กันแล้ว ต่อไปนี้จะเป็นการทดลองติดตั้ง LAMP กัน ในตัวอย่างนี้เป็นการติดตั้งบน Ubuntu 18.04 และในแต่ละขั้นตอนอาจจะมีความเกี่ยวเนื่องกันอยู่ขอให้ผู้อ่านลองทำไปตามลำดับนะครับ ถ้าไม่ทำตามลำดับก็โปรดระวังในการใช้งานด้วย ทั้งนี้ทางผู้เขียนและ EPT ไม่ขอรับผิดชอบต่อความเสียหายที่อาจจะเกิดขึ้นจากการทำตามขั้นตอนทั้งหมดในหน้านี้นะครับ 

***ขอเน้นย้ำว่า การใช้งาน Command Line ถ้าพิมพ์คำสั่งผิดแม้แต่ตัวเดียว จะส่งผลให้ไม่สามารถทำตามคำสั่งนั้นได้ หรืออาจจะทำคำสั่งผิดไปจากที่เราต้องการเลย ถ้าโชคร้ายสุดๆอาจทำให้คอมพิวเตอร์มีปัญหา หรือทำให้โปรเจกต์พันล้านของท่านผู้อ่านหายไปในพริบตาได้เลยครับ จึงต้องระวังให้มากๆๆๆๆนะครับ***

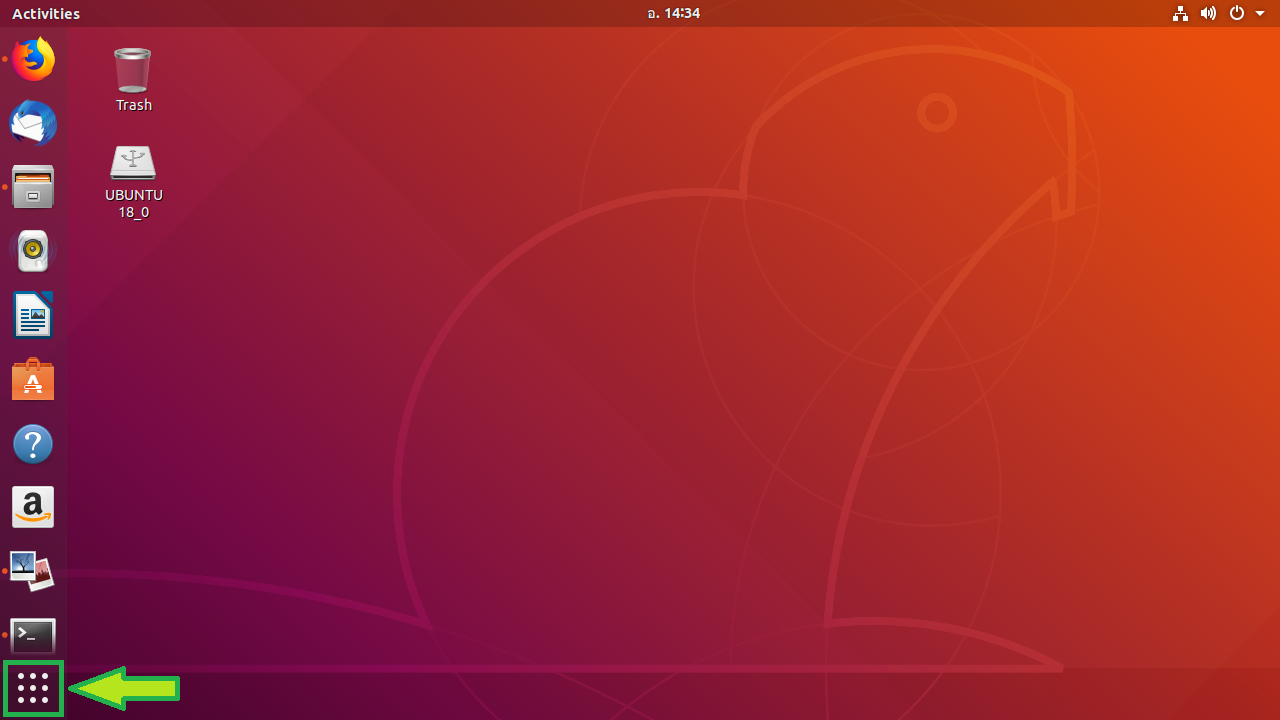
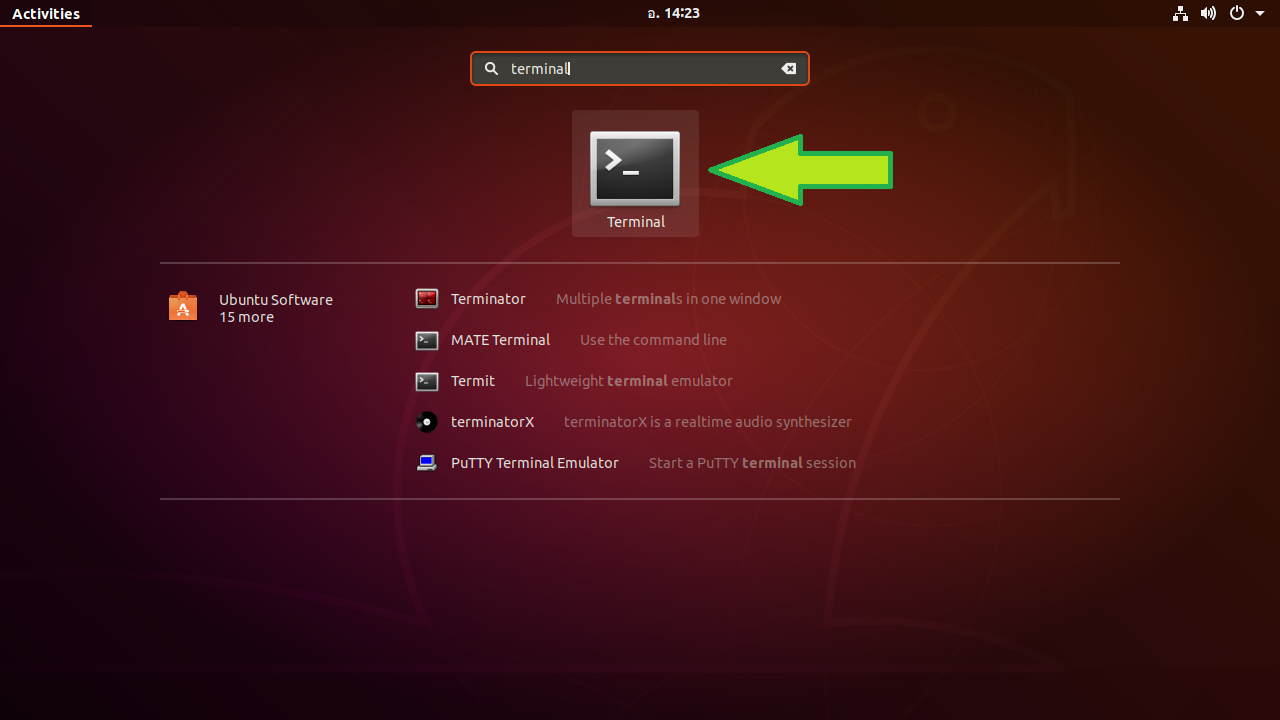
1. เปิด Terminal ขึ้นมา สำหรับ Ubuntu 18.04 ให้กดเมนูมุมซ้ายล่าง(ดูภาพประกอบ) จากนั้น พิมพ์คำว่า Terminal แล้วกดเปิดโปรแกรม Terminal ถ้าไม่รู้จัก Terminal ของให้อ่านบทความ A20_Linux_CommandLine
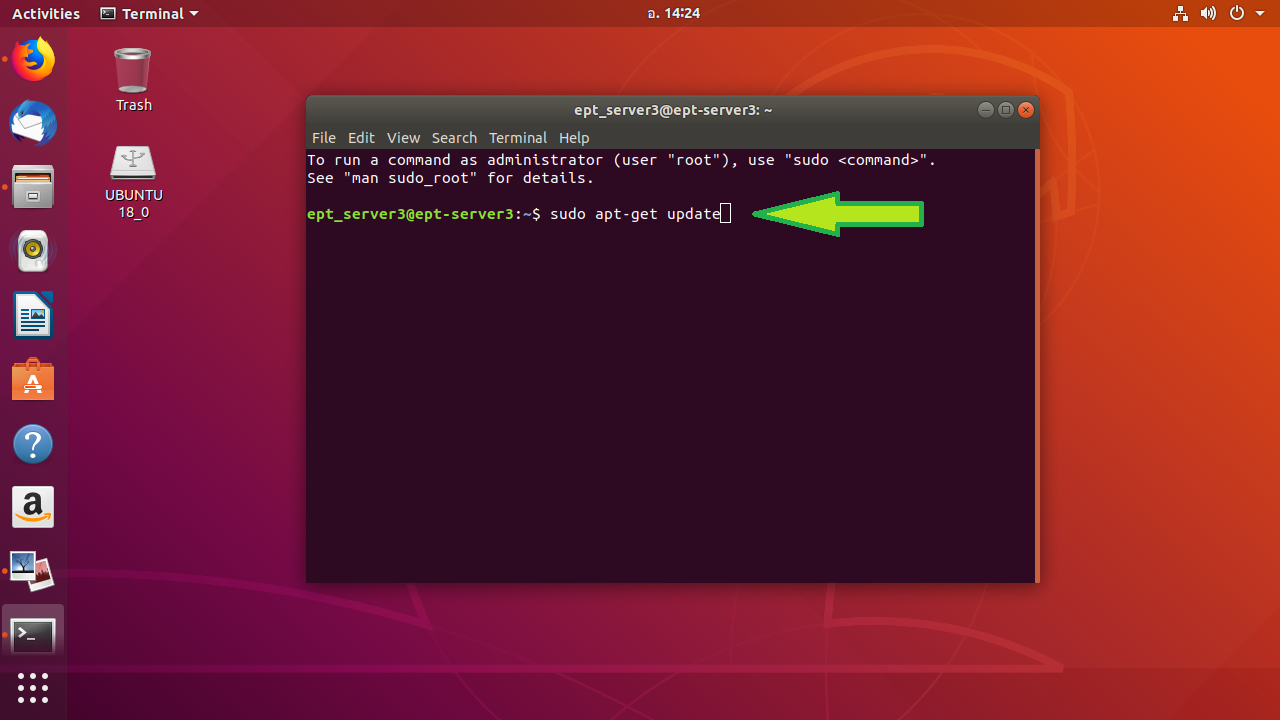
2. Update เครื่องที่ใช้

sudo apt-get update

3. ติดตั้ง Apache

sudo apt-get install apache2

4. ตั้งค่า Firewall สำหรับ incoming HTTP and HTTPS traffic

sudo ufw allow in "Apache Full"

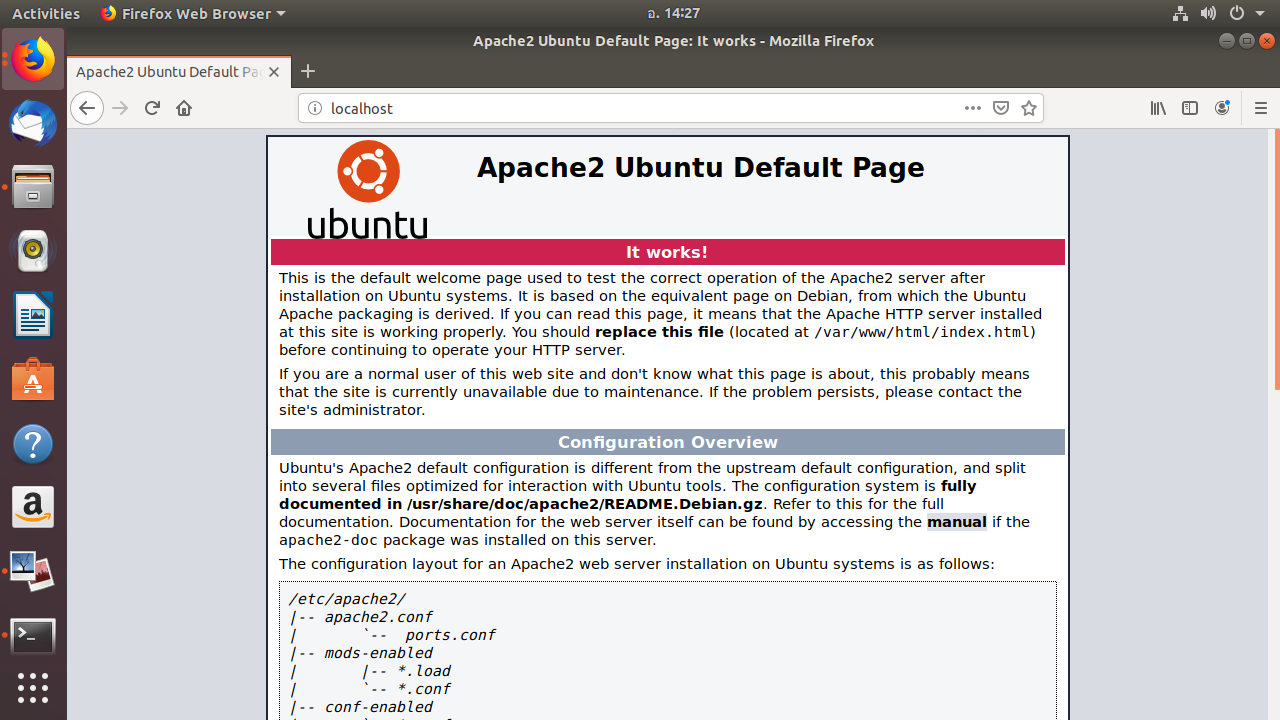
5. เมื่อมาถึงขั้นนี้แล้วให้ทดลองดูว่าลง Apache ได้สำเร็จไหม โดยเปิดเว็บ Browser ขึ้นมาแล้วเข้าเว็บ http://localhost หรือ server_ip ของตัวเอง ถ้าทุกอย่างถูกต้องจะขึ้นเว็บเพจหน้า default ของ Apache ดังภาพ
6. ติดตั้ง MySQL

sudo apt-get install mysql-server

7. ติดตั้ง PHP

sudo apt-get install php libapache2-mod-php php-mysql

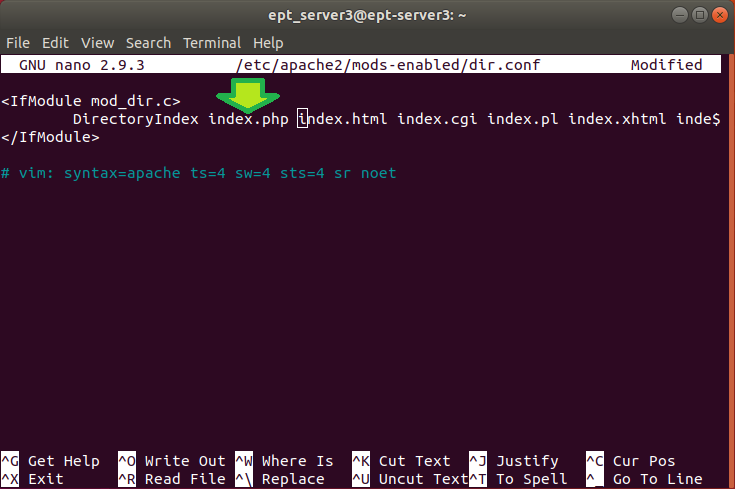
8. โดยทั่วไปเมื่อมี request เข้ามา Apache มักจะเปิดไฟล์ชื่อ index.html ก่อน ในกรณีที่เราต้องการให้เปิดไฟล์ index.php ก่อน สามารถทำได้โดยเปิด config file ขึ้นมาแก้ไขดังนี้

sudo nano /etc/apache2/mods-enabled/dir.conf

จะเห็นว่าภายในไฟล์จะมีข้อความ

 
    DirectoryIndex index.html index.cgi index.pl index.php index.xhtml index.htm


ให้แก้ไขโดยย้าย index.php มาไว้ข้างหน้า จากนั้นกดปุ่ม Ctrl+X แล้วยืนยันว่าจะบันทึกโดยกดปุ่ม Y แล้วกด Enter

 
    DirectoryIndex index.php index.html index.cgi index.pl index.xhtml index.htm
 

Restart Apache web server

sudo systemctl restart apache2

เสร็จแล้วครับ เย้ๆๆๆ

9. ของแถม: ติดตั้ง phpMyAdmin สำหรับ Database สามารถทำได้โดยใช้คำสั่ง

sudo apt-get install phpmyadmin

ทดลองเข้า phpMyAdmin ได้โดยเปิดเว็บ Browser ขึ้นมาแล้วเข้าเว็บ http://localhost/phpmyadmin

บางเครื่องเมื่อลงแล้วจะยังไม่สามารถเข้าหน้า phpmyadmin ได้เพราะต้องตั้งค่าบางอย่างก่อน ถ้าเครื่องไหนเข้าไม่ได้ให้ลองค้นหาวิธีแก้ไขจากอินเตอร์เน็ตดูนะครับ


เป็นอย่างไรบ้างครับกับการติดตั้ง Web server บน Ubuntu ง่ายใช่ไหมครับ

สุดท้ายนี้ถ้าผู้อ่านอยากเรียนรู้เรื่องเกี่ยวกับ Web Programming อย่างลึกซึ้งก็ขอแนะนำคอร์ส Web Programming ของทาง EPT ครับ สามารถดูรายละเอียดคอร์สได้โดยคลิกที่นี่ นอกจากนี้สำหรับผู้ที่อยากเริ่มต้นเรียนรู้การเขียนโปรแกรมผมก็ขอแนะนำคอร์ส Python สามารถดูรายละเอียดคอร์สได้โดยคลิกที่นี่หรือติดต่อได้ที่ 085-350-7540

แล้วพบกันใหม่บทความหน้าครับ


Tag ที่น่าสนใจ: ubuntu lamp_stack linux apache mysql php terminal command_line web_server html css javascript programming tutorial


บทความนี้อาจจะมีที่ผิด กรุณาตรวจสอบก่อนใช้

หากมีข้อผิดพลาด/ต้องการพูดคุยเพิ่มเติมเกี่ยวกับบทความนี้ กรุณาแจ้งที่ http://m.me/Expert.Programming.Tutor

ไม่อยากอ่าน Tutorial อยากมาเรียนเลยทำอย่างไร?

สมัครเรียน ONLINE ได้ทันทีที่ https://elearn.expert-programming-tutor.com

หรือติดต่อ

085-350-7540 (DTAC)
084-88-00-255 (AIS)
026-111-618
หรือทาง EMAIL: NTPRINTF@GMAIL.COM
แผนที่ ที่ตั้งของอาคารของเรา

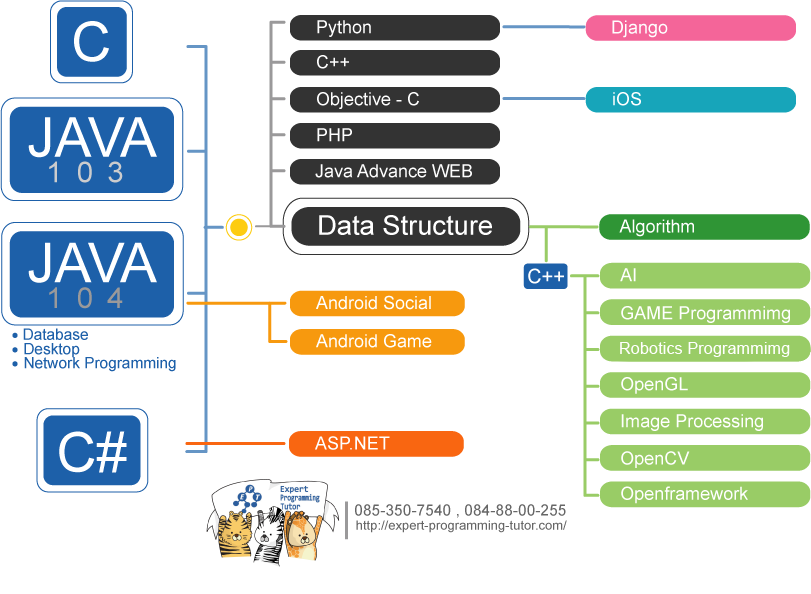
แผนผังการเรียนเขียนโปรแกรม

Link อื่นๆ

Allow sites to save and read cookie data.
Cookies are small pieces of data created by sites you visit. They make your online experience easier by saving browsing information. We use cookies to improve your experience on our website. By browsing this website, you agree to our use of cookies.

Copyright (c) 2013 expert-programming-tutor.com. All rights reserved. | 085-350-7540 | 084-88-00-255 | ntprintf@gmail.com

ติดต่อเราได้ที่

085-350-7540 (DTAC)
084-88-00-255 (AIS)
026-111-618
หรือทาง EMAIL: NTPRINTF@GMAIL.COM
แผนที่ ที่ตั้งของอาคารของเรา