สมัครเรียนโทร. 085-350-7540 , 084-88-00-255 , ntprintf@gmail.com
![]()
หลังจากที่ได้ลองสร้าง React Application แบบเป็นเว็บที่มีหลายหน้ากันไปใน React06: Web Application - Multiple Pages ในบทความนี้ เราจะมาทดลองสร้างเว็บที่มีหลายหน้าด้วย react-router และเรียนรู้เรื่องลำดับการทำงานของ Component Lifecycle นิดหน่อย โดยการทดลองเรียก APIs เพื่อดึงข้อมูลอสังหาริมทรัพย์จากเว็บอื่นมาใช้ ซึ่งบ่อยครั้งที่การดึงข้อมูลจะใช้เวลาพอสมควร ดังนั้นเราจะเอาโค้ดส่วนดึงข้อมูลนี้ใส่ในฟังก์ชัน componentDidMount() ซึ่งเป็นฟังก์ชันที่จะถูกเรียกหลังจากฟังก์ชัน Render เอา Component ต่าง ๆ ไปไว้บน DOM แล้ว จากนั้นจะสั่งในฟังก์ชัน componentDidMount() ให้อัปเดตค่าใน state เพื่อให้แสดงผลในหน้าเว็บอีกที
สำหรับใครที่ไม่รู้ว่า APIs คืออะไร สามารถอ่านได้จากบทความ A18 WhatIs02 API
*** เพื่อไม่ให้เกิดข้อผิดพลาด ขอให้ผู้เรียนค่อย ๆ อ่านทำความเข้าใจ และทำตามขั้นตอนเป๊ะ ๆ นะครับ ***
1. เปิดโปรแกรม Command Prompt หรือ Terminal แล้วสร้าง React application ด้วยคำสั่ง
| npx create-react-app re_ws_07 |
2. พิมพ์คำสั่งต่อไปนี้เพื่อเข้าไปที่โฟลเดอร์แอปพลิเคชันที่สร้าง แล้วทำการติดตั้ง react-router
| cd re_ws_07 |
| npm install react-router-dom |
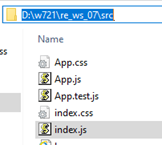
1. เปิดไฟล์ src/index.js ที่อยู่ในโฟลเดอร์แอปพลิเคชันด้วย Text editor แล้วแก้โค้ดเป็นดังนี้
import React from 'react';
import ReactDOM from 'react-dom';
import './index.css';
import App from './App';
import reportWebVitals from './reportWebVitals';
import { BrowserRouter } from 'react-router-dom';

ReactDOM.render(
  <BrowserRouter>
    <App />
  </BrowserRouter>,
  document.getElementById('root')
);

reportWebVitals();
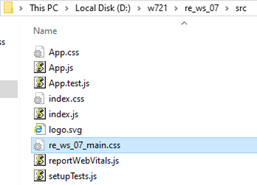
2. ดาวน์โหลดไฟล์ style ชื่อ re_ws_07_main.css จากที่นี่ จากนั้นย้ายไฟล์ที่ดาวน์โหลดมาใส่ในโฟลเดอร์ src ที่อยู่ในโฟลเดอร์แอปพลิเคชัน
3. สร้างไฟล์ชื่อ Main.js ในโฟลเดอร์ src เพื่อเป็นหน้าเว็บหลักแสดงข้อมูลอสังหาริมทรัพย์ทั้งหมด และในไฟล์ src/Main.js ที่สร้างให้เขียนโค้ดดังนี้
import { React, Component } from "react";
import { Link } from "react-router-dom";
import './re_ws_07_main.css';

class MainPage extends Component {
    constructor(props) {
        super(props);
        this.state = {real_estates: []};
    }

    componentDidMount() {
        var cors_api_host = 'https://cors-anywhere.herokuapp.com/';
        fetch(cors_api_host + 'expert-programming-tutor.com/Downloads/w721/property_search.php')
        .then(response => response.json())
        .then(response => this.setState({real_estates: response}))
        .catch(error => console.log(error));
    }

    render(){
        return (
        <div>
        {this.state.real_estates.map(function(real_estate, index){
		let linkURL = "/detail?id=" + real_estate.id;
		return (
		<section className={"card"} key={index}>
		<Link to={linkURL}>
			<div className={"img-container"}>
			<img src={real_estate.image_01} alt='x' /></div>
			<p><b>{real_estate.real_estate_name}</b><br />
			<b>Location:</b> {real_estate.LOCATION}<br />
			<b>Type:</b> {real_estate.property_type}<br />
			<b>Sale price:</b> {real_estate.SALE_PRICE}<br />
			<b>Rent price:</b> {real_estate.RENT_PRICE}</p>
			<button>More detail...</button>
		</Link></section>
        );})}
        </div>
        );
    }
}
export default MainPage;
4. สร้างไฟล์ชื่อ Detail.js ในโฟลเดอร์ src เพื่อเป็นหน้าที่ใช้แสดงรายละเอียดของแต่ละรายการ และในไฟล์ src/Detail.js ที่สร้างให้เขียนโค้ดดังนี้
import { React, Component } from "react";
import './re_ws_07_main.css';

class DetailPage extends Component {
    constructor(props) {
        super(props);
        this.state = {real_estate: [],
            showImage: [true,false,false,false,false]};
    }

    componentDidMount() {
        var item_id = this.props.location.search.substring(4);
        var cors_api_host = 'https://cors-anywhere.herokuapp.com/';
        fetch(cors_api_host + 'expert-programming-tutor.com/Downloads/w721/property_detail.php?id=' + item_id)
        .then(response => response.json())
        .then(response => this.setState({real_estate: response}))
        .catch(error => console.log(error));
    }

    showSlides = (n) => {
        let show = [false,false,false,false,false];
        show[n] = true;
        this.setState({showImage: show});
    }

    render(){
        return (
        <div>
            <section className="card2">
            <div className="slideshow-container">
  <div className="mySlides fade" style={{display: this.state.showImage[0] ? 'block' : 'none' }}>
                <img src={this.state.real_estate.image_01} alt="x" /></div>
  <div className="mySlides fade" style={{display: this.state.showImage[1] ? 'block' : 'none' }}>
                <img src={this.state.real_estate.image_02} alt="x" /></div>
  <div className="mySlides fade" style={{display: this.state.showImage[2] ? 'block' : 'none' }}>
                <img src={this.state.real_estate.image_03} alt="x" /></div>
  <div className="mySlides fade" style={{display: this.state.showImage[3] ? 'block' : 'none' }}>
                <img src={this.state.real_estate.image_04} alt="x" /></div>
  <div className="mySlides fade" style={{display: this.state.showImage[4] ? 'block' : 'none' }}>
                <img src={this.state.real_estate.image_05} alt="x" /></div>
            </div><br />
            <div style={{textAlign:"center"}}>
                <span className="dot" onClick={() => this.showSlides(0)}>
                <img src={this.state.real_estate.image_01} alt="x" /></span>
                <span className="dot" onClick={() => this.showSlides(1)}>
                <img src={this.state.real_estate.image_02} alt="x" /></span>
                <span className="dot" onClick={() => this.showSlides(2)}>
                <img src={this.state.real_estate.image_03} alt="x" /></span>
                <span className="dot" onClick={() => this.showSlides(3)}>
                <img src={this.state.real_estate.image_04} alt="x" /></span>
                <span className="dot" onClick={() => this.showSlides(4)}>
                <img src={this.state.real_estate.image_05} alt="x" /></span>
            </div>
            <p><b>REAL ESTATE NAME:</b> {this.state.real_estate.real_estate_name}<br />
            <b>LOCATION:</b> {this.state.real_estate.LOCATION}<br />
            <b>LATITUDE:</b> {this.state.real_estate.lat}<br />
            <b>LONGITUDE:</b> {this.state.real_estate.lon}<br />
            <b>TYPE:</b> {this.state.real_estate.property_type}</p><hr />
            <p><b>TRANSACTION:</b> {this.state.real_estate.TRANSACTION}<br />
            <b>SALE TERMS:</b> {this.state.real_estate.SALE_TERMS}<br />
            <b>SALE PRICE:</b> {this.state.real_estate.SALE_PRICE} BAHT<br />
            <b>RENT PRICE:</b> {this.state.real_estate.RENT_PRICE} BAHT<br />
            <b>COMMON CHARGES:</b> {this.state.real_estate.COMMON_CHARGES} BAHT</p><hr />
            <p><b>LAND AREA:</b> {this.state.real_estate.LAND_AREA} SQ.WAH<br />
            <b>UNIT SIZE:</b> {this.state.real_estate.UNIT_SIZE} SQ.M<br />
            <b>DECORATION STYLE:</b> {this.state.real_estate.DECORATION_STYLE}<br />
            <b>NUMBER OF BEDROOMS:</b> {this.state.real_estate.BEDROOMS}<br />
            <b>NUMBER OF BATHROOMS:</b> {this.state.real_estate.BATHROOMS}<br />
            <b>DIRECTION OF ROOM:</b> {this.state.real_estate.DIRECTION_OF_ROOM}</p><hr />
            <p><b>INROOM FACILITIES:</b> {this.state.real_estate.INROOM_FACILITIES}<br />
            <b>PUBLIC FACILITIES:</b> {this.state.real_estate.PUBLIC_FACILITIES}</p><hr />
            <p><b>CONTACT:</b> 085-350-7540 | 084-8800-255 | ntprintf@gmail.com</p>
          </section>
        </div>
        );
    }
}
export default DetailPage;
5. เปิดไฟล์ src/App.js ที่อยู่ในโฟลเดอร์แอปพลิเคชันด้วย Text editor แล้วแก้โค้ดเป็นดังต่อไปนี้ ซึ่งเป็นการเพิ่ม Main component และ Detail component พร้อมทั้ง route path ของแต่ละหน้า
import { React, Fragment } from "react";
import { Switch, Route} from 'react-router-dom';
import Main from "./Main";
import Detail from "./Detail";

const App = () => (
<Fragment>
	<header>
		<h1>EPT Real Estate</h1>
	</header>

	<Switch>
		<Route exact path='/' component={Main}></Route>
		<Route exact path='/detail' component={Detail}></Route>
	</Switch>
</Fragment>
);
export default App;
6. หลังจากบันทึกไฟล์เรียบร้อยแล้ว ให้พิมพ์คำสั่ง npm start เพื่อทดสอบการทำงานของแอปที่สร้าง แล้วไปที่หน้าเว็บ http://localhost:3000 ถ้าทุกอย่างถูกต้องจะเห็นหน้าเว็บแสดงข้อมูลอสังหาริมทรัพย์ทั้งหมด และสามารถกดเข้าไปดูรายละเอียดของแต่ละรายการได้ดังภาพ

หมายเหตุ: ในกรณีที่รอสักพักแล้วหน้าเว็บไม่ขึ้นดังตัวอย่างอาจเป็นเพราะปัญหาเรื่อง CORS ซึ่งจะเกิดเมื่อมีการเรียก API ข้ามโดเมน ในตัวอย่างนี้เราจะแก้ปัญหาเฉพาะหน้าแบบง่าย ๆ ไปก่อนโดยใช้ herokuapp ให้ผู้เรียนเข้าไปที่เว็บ https://cors-anywhere.herokuapp.com/corsdemo แล้วกดปุ่ม Request temporary access to the demo server จะขึ้นข้อความดังภาพ เสร็จแล้วให้กลับไปที่หน้าเว็บของเราแล้วกด Refresh

เสร็จแล้วครับ เว็บแบบมีหลายหน้าพร้อมเรียก APIs ถ้าใครสนใจอยากเรียนเรื่อง React ให้ลึกซึ้งยิ่งขึ้นก็ขอแนะนำ คอร์สเรียนเขียนโปรแกรม React ฉบับไม่โหด (W721) แต่ถ้าผู้อ่านยังไม่มีพื้นฐานการทำเว็บมากก่อน ก็ขอแนะนำคอร์ส Web Programming ของทาง EPT ซึ่งจะสอนตั้งแต่พื้นฐานครับ สามารถคลิกที่นี่เพื่อดูรายละเอียดคอร์ส Web Programming หรือติดต่อได้ที่ 085-350-7540
ในบทความต่อไป เราจะมาลองทำเว็บเครื่องคิดเลขกัน แล้วพบกันใหม่บทความหน้านะครับ
Tag ที่น่าสนใจ: react_application react-router apis component_lifecycle fetch_api react_router_dom web_development frontend_development
หากมีข้อผิดพลาด/ต้องการพูดคุยเพิ่มเติมเกี่ยวกับบทความนี้ กรุณาแจ้งที่ http://m.me/Expert.Programming.Tutor
085-350-7540 (DTAC)
084-88-00-255 (AIS)
026-111-618
หรือทาง EMAIL: NTPRINTF@GMAIL.COM
Copyright (c) 2013 expert-programming-tutor.com. All rights reserved. | 085-350-7540 | 084-88-00-255 | ntprintf@gmail.com