สมัครเรียนโทร. 085-350-7540 , 084-88-00-255 , ntprintf@gmail.com

Spring

Spring Framework พื้นฐาน - Spring Framework คืออะไร Spring Framework พื้นฐาน - ความแตกต่างระหว่าง Spring และ Spring Boot Spring Framework พื้นฐาน - การติดตั้ง Spring Framework Spring Framework พื้นฐาน - การตั้งค่าโปรเจกต์ Spring ด้วย Maven/Gradle Spring Framework พื้นฐาน - IoC (Inversion of Control) คืออะไร Spring Framework พื้นฐาน - DI (Dependency Injection) คืออะไร Spring Framework พื้นฐาน - Bean ใน Spring คืออะไร Spring Framework พื้นฐาน - การสร้างและจัดการ Bean ใน Spring Spring Framework พื้นฐาน - การใช้ @Component และ @Service ในการสร้าง Bean Spring Framework พื้นฐาน - การใช้ @Autowired เพื่อ Inject Dependencies Spring Framework พื้นฐาน - การทำงานของ ApplicationContext ใน Spring Spring Framework พื้นฐาน - Bean Scope ใน Spring (Singleton, Prototype) Spring Framework พื้นฐาน - การใช้ @Configuration และ @Bean ใน Spring Spring Framework พื้นฐาน - การใช้ @Qualifier เพื่อเลือก Bean Spring Framework พื้นฐาน - การใช้ @Primary เพื่อกำหนด Bean หลัก Spring Framework พื้นฐาน - ความแตกต่างระหว่าง @Autowired และ @Resource Spring Framework พื้นฐาน - การทำงานกับ Property Files ใน Spring Spring Framework พื้นฐาน - การอ่านค่า Property ด้วย @Value Spring Framework พื้นฐาน - การใช้ @PropertySource เพื่อโหลดไฟล์ Property Spring Framework พื้นฐาน - การทำงานกับ Profiles ใน Spring (@Profile) Spring AOP - AOP ใน Spring คืออะไร Spring AOP - การใช้ @Aspect เพื่อสร้าง Aspect Spring AOP - การใช้ @Before เพื่อทำงานก่อนเมธอด Spring AOP - การใช้ @After เพื่อทำงานหลังเมธอด Spring AOP - การใช้ @Around เพื่อควบคุมการทำงานของเมธอด Spring AOP - การใช้ @AfterReturning เพื่อจัดการผลลัพธ์ที่คืนจากเมธอด Spring AOP - การใช้ Pointcut Expressions ใน AOP Spring AOP - การสร้าง Custom Annotations ด้วย AOP Spring AOP - การจัดการข้อยกเว้นใน AOP ด้วย @AfterThrowing Spring AOP - การใช้ Proxy ใน Spring AOP Spring Data Access - การทำงานกับ JDBC ใน Spring Spring Data Access - Spring JDBC Template คืออะไร Spring Data Access - การใช้ JDBC Template เพื่อรัน Query Spring Data Access - การเชื่อมต่อกับฐานข้อมูล MySQL ด้วย Spring JDBC Spring Data Access - การใช้ RowMapper เพื่อแมปผลลัพธ์จากฐานข้อมูล Spring Data Access - การทำ Transaction Management ใน Spring Spring Data Access - การใช้ @Transactional ในการจัดการทรานแซคชั่น Spring Data Access - การใช้ DataSource ใน Spring Spring Data Access - Spring ORM (Object-Relational Mapping) คืออะไร Spring Data Access - การเชื่อมต่อกับฐานข้อมูลด้วย Hibernate และ Spring Spring MVC - Spring MVC คืออะไร Spring MVC - การสร้าง Controller ใน Spring MVC ด้วย @Controller Spring MVC - การใช้ @RequestMapping เพื่อแมป URL Spring MVC - การใช้ @GetMapping และ @PostMapping Spring MVC - การรับค่าพารามิเตอร์จาก URL ด้วย @RequestParam Spring MVC - การใช้ @PathVariable เพื่อจับค่าจาก URL Spring MVC - การส่งข้อมูลกลับจาก Controller ด้วย @ResponseBody Spring MVC - การใช้ Model และ View ใน Spring MVC Spring MVC - การจัดการกับฟอร์มใน Spring MVC Spring MVC - การอัปโหลดไฟล์ด้วย Spring MVC Spring Boot พื้นฐาน - Spring Boot คืออะไร Spring Boot พื้นฐาน - การติดตั้ง Spring Boot CLI Spring Boot พื้นฐาน - การสร้างโปรเจกต์ Spring Boot ด้วย Spring Initializr Spring Boot พื้นฐาน - การทำงานของไฟล์ application.properties Spring Boot พื้นฐาน - การใช้ไฟล์ application.yml แทน application.properties Spring Boot พื้นฐาน - การรันแอปพลิเคชัน Spring Boot ด้วย mvn spring-boot:run Spring Boot พื้นฐาน - Auto Configuration ใน Spring Boot คืออะไร Spring Boot พื้นฐาน - การใช้ @SpringBootApplication Spring Boot พื้นฐาน - Spring Boot Starters คืออะไร Spring Boot พื้นฐาน - การใช้ DevTools ใน Spring Boot สำหรับ Hot Reload Spring Boot Web Application - การสร้าง REST API ด้วย Spring Boot Spring Boot Web Application - การสร้าง Controller ใน Spring Boot Spring Boot Web Application - การจัดการกับ HTTP GET และ POST ใน Spring Boot Spring Boot Web Application - การใช้ @RestController ในการสร้าง REST API Spring Boot Web Application - การใช้ @RequestMapping และ @GetMapping ใน Spring Boot Spring Boot Web Application - การส่ง Response ด้วย JSON ใน Spring Boot Spring Boot Web Application - การใช้ @RequestBody เพื่อรับข้อมูล JSON Spring Boot Web Application - การใช้ @PathVariable ใน Spring Boot Spring Boot Web Application - การรับค่าจาก Query Parameters ด้วย @RequestParam Spring Boot Web Application - การจัดการ Error Handling ใน Spring Boot REST API Spring Boot Data Access - การใช้ Spring Data JPA กับ Spring Boot Spring Boot Data Access - การตั้งค่า DataSource ใน Spring Boot Spring Boot Data Access - การเชื่อมต่อฐานข้อมูล MySQL ใน Spring Boot Spring Boot Data Access - การใช้ @Entity และ @Table เพื่อสร้าง Entity ใน JPA Spring Boot Data Access - การใช้ @Id และ @GeneratedValue ในการสร้าง Primary Key Spring Boot Data Access - การสร้าง Repository ด้วย JpaRepository Spring Boot Data Access - การใช้ @Query เพื่อสร้าง Custom Queries Spring Boot Data Access - การจัดการ One-to-Many Relationships ใน JPA Spring Boot Data Access - การจัดการ Many-to-Many Relationships ใน JPA Spring Boot Data Access - การใช้ Spring Boot กับ H2 Database สำหรับการทดสอบ Spring Security - Spring Security คืออะไร Spring Security - การเพิ่ม Spring Security ในโปรเจกต์ Spring Security - การกำหนด Basic Authentication ด้วย Spring Security Spring Security - การกำหนด Role และ Permissions ใน Spring Security Spring Security - การใช้ Custom Login Page ใน Spring Security Spring Security - การใช้ JWT (JSON Web Token) ใน Spring Security Spring Security - การทำ OAuth2 Authentication ใน Spring Boot Spring Security - การใช้ Security Filters ใน Spring Security Spring Security - การจัดการกับ CSRF (Cross-Site Request Forgery) ใน Spring Security Spring Security - การใช้ BCrypt ในการเข้ารหัสรหัสผ่าน Spring Boot การทดสอบและการจัดการอื่น ๆ - การเขียน Unit Test ด้วย JUnit ใน Spring Boot Spring Boot การทดสอบและการจัดการอื่น ๆ - การเขียน Integration Test ใน Spring Boot Spring Boot การทดสอบและการจัดการอื่น ๆ - การใช้ Spring Boot Test เพื่อทดสอบ REST API Spring Boot การทดสอบและการจัดการอื่น ๆ - การใช้ MockMVC เพื่อทดสอบ Controller Spring Boot การทดสอบและการจัดการอื่น ๆ - การทำ Logging ใน Spring Boot ด้วย SLF4J Spring Boot การทดสอบและการจัดการอื่น ๆ - การใช้ Actuator ใน Spring Boot เพื่อตรวจสอบสถานะของแอปพลิเคชัน Spring Boot การทดสอบและการจัดการอื่น ๆ - การตั้งค่า Health Check Endpoint ด้วย Spring Boot Actuator Spring Boot การทดสอบและการจัดการอื่น ๆ - การใช้งาน Spring Boot Admin เพื่อจัดการแอปพลิเคชัน Spring Boot การทดสอบและการจัดการอื่น ๆ - การทำงานกับ Microservices ด้วย Spring Cloud Spring Boot การทดสอบและการจัดการอื่น ๆ - การใช้ Spring Boot กับ Docker

Spring Boot Data Access - การตั้งค่า DataSource ใน Spring Boot


สามารถกล่าวได้ว่า ในโลกแห่งการพัฒนาแอปพลิเคชันทางธุรกิจสมัยใหม่ ความสามารถในการเข้าถึงและจัดการข้อมูลจากฐานข้อมูลอย่างมีประสิทธิภาพคือหัวใจสำคัญที่ทำให้แอปพลิเคชันทำงานได้รวดเร็วและเชื่อถือได้ หนึ่งในเครื่องมือที่นักพัฒนาจำนวนมากเลือกใช้ในการจัดการการเชื่อมต่อกับฐานข้อมูลในแอปพลิเคชัน Java คือ Spring Boot สิ่งที่ทำให้ Spring Boot โดดเด่นอยู่ที่ความสามารถในการตั้งค่า DataSource ได้ง่ายและตรงความต้องการ บทความนี้จะพาผู้อ่านไปรู้จักกับการตั้งค่า DataSource ใน Spring Boot ที่ไม่เพียงแต่จะช่วยเพิ่มประสิทธิภาพของแอปพลิเคชัน แต่ยังช่วยให้การพัฒนาเป็นไปอย่างราบรื่น


ทำความเข้าใจเกี่ยวกับ DataSource

ก่อนที่เราจะเข้าสู่การตั้งค่า DataSource ใน Spring Boot สิ่งแรกที่ควรทำความเข้าใจคือ แนวคิดของ DataSource itself ในโลกของ Java DataSource คือตัวกลางสำหรับการเชื่อมต่อไปยังฐานข้อมูล โดยมันจะเป็นตัวจัดการการเชื่อมต่อทั้งหมด ซึ่งนั่นจะช่วยลดปัญหาจากการสร้างการเชื่อมต่อซ้ำๆ ที่อาจทำให้แอปพลิเคชันทำงานช้าลงหรือแม้กระทั่งทำให้การเชื่อมต่อเกินลิมิต


การตั้งค่า DataSource ใน Spring Boot

Spring Boot มี spring-boot-starter-data-jpa ซึ่งเป็น starter ที่ช่วยในการเชื่อมต่อและจัดการกับฐานข้อมูล โดยการกำหนดค่า DataSource สามารถทำได้ง่ายๆ ผ่านไฟล์ application.properties หรือ application.yml ในโฟลเดอร์ resources ของโปรเจกต์

ขั้นตอนการตั้งค่า

1. เพิ่ม Dependency สำหรับ Spring Data JPA และฐานข้อมูลที่ต้องการ เช่น H2, MySQL หรือ PostgreSQL ลงในไฟล์ `pom.xml`


   <dependencies>
       <dependency>
           <groupId>org.springframework.boot</groupId>
           <artifactId>spring-boot-starter-data-jpa</artifactId>
       </dependency>
       <dependency>
           <groupId>mysql</groupId>
           <artifactId>mysql-connector-java</artifactId>
           <scope>runtime</scope>
       </dependency>
   </dependencies>

2. ตั้งค่า DataSource ใน `application.properties`

ตัวอย่าง: กำหนดค่า MySQL DataSource


   spring.datasource.url=jdbc:mysql://localhost:3306/your_database_name
   spring.datasource.username=your_username
   spring.datasource.password=your_password
   spring.datasource.driver-class-name=com.mysql.cj.jdbc.Driver
   spring.jpa.hibernate.ddl-auto=update
   spring.jpa.show-sql=true
   spring.jpa.properties.hibernate.dialect=org.hibernate.dialect.MySQL5Dialect

การตั้งค่าเหล่านี้จะทำให้ Spring Boot สามารถสร้างการเชื่อมต่อกับฐานข้อมูล MySQL ได้อย่างอัตโนมัติ

3. ทดสอบการเชื่อมต่อกับฐานข้อมูล

หลังจากตั้งค่าเรียบร้อยแล้ว สามารถทดสอบการเชื่อมต่อผ่าน Test class หรือ run แอปพลิเคชันเพื่อดูว่าการเชื่อมต่อเป็นไปได้อย่างราบรื่นหรือไม่


ตัวอย่างการใช้งาน

สมมุติว่าเราจะสร้างแอปพลิเคชันเพื่อจัดการข้อมูลของหนังสือ เราอาจเริ่มจากการสร้าง Entity Class ที่ชื่อว่า `Book`


@Entity
public class Book {

    @Id
    @GeneratedValue(strategy = GenerationType.IDENTITY)
    private Long id;

    private String title;
    private String authorName;

    // getters and setters
}

จากนั้นสร้าง Repository Interface สำหรับจัดการกับข้อมูลของหนังสือ


public interface BookRepository extends JpaRepository<Book, Long> {
    List<Book> findByAuthorName(String authorName);
}

ด้วยการตั้งค่า DataSource ที่ถูกต้องและการสร้างดาตาโมเดลที่มีประสิทธิภาพ Spring Boot จะช่วยให้เราจัดการข้อมูลของเราผ่าน Repository Pattern อย่างง่ายดาย โดยไม่ต้องเขียนโค้ด SQL ที่ซับซ้อน


สรุป

การตั้งค่า DataSource ใน Spring Boot เป็นสิ่งที่สำคัญแต่สามารถทำได้ง่ายหากเข้าใจวิธีการและมีการวางแผนที่ดี การเลือกใช้ DataSource ที่เหมาะสมจะช่วยให้แอปพลิเคชันสามารถทำงานได้อย่างมีประสิทธิภาพมากขึ้น และนี่เป็นเพียงส่วนหนึ่งของประโยชน์จากการใช้ Spring Boot สำหรับผู้ที่สนใจลงทุนเวลาศึกษาการพัฒนาแอปพลิเคชันด้วย Spring Boot สามารถเสริมความรู้และทักษะทางด้านนี้ได้อย่างก้าวไกล

ครั้นเข้าสู่โลกของนักพัฒนามืออาชีพหรือผู้ที่เพิ่งเริ่มศึกษา Spring Boot ด้วยพื้นฐานของ Java สนุกไปกับการเรียนรู้ และสร้างผลงานที่โดดเด่น เพื่อประสบการณ์ใหม่ ๆ ที่ไม่มีวันสิ้นสุด!


หมายเหตุ: ข้อมูลในบทความนี้อาจจะผิด โปรดตรวจสอบความถูกต้องของบทความอีกครั้งหนึ่ง บทความนี้ไม่สามารถนำไปใช้อ้างอิงใด ๆ ได้ ทาง EPT ไม่ขอยืนยันความถูกต้อง และไม่ขอรับผิดชอบต่อความเสียหายใดที่เกิดจากบทความชุดนี้ทั้งทางทรัพย์สิน ร่างกาย หรือจิตใจของผู้อ่านและผู้เกี่ยวข้อง

หากเจอข้อผิดพลาด หรือต้องการพูดคุย ติดต่อได้ที่ https://m.me/expert.Programming.Tutor/


Tag ที่น่าสนใจ: java c# vb.net python c c++ machine_learning web database oop cloud aws ios android


บทความนี้อาจจะมีที่ผิด กรุณาตรวจสอบก่อนใช้

หากมีข้อผิดพลาด/ต้องการพูดคุยเพิ่มเติมเกี่ยวกับบทความนี้ กรุณาแจ้งที่ http://m.me/Expert.Programming.Tutor

ไม่อยากอ่าน Tutorial อยากมาเรียนเลยทำอย่างไร?

สมัครเรียน ONLINE ได้ทันทีที่ https://elearn.expert-programming-tutor.com

หรือติดต่อ

085-350-7540 (DTAC)
084-88-00-255 (AIS)
026-111-618
หรือทาง EMAIL: NTPRINTF@GMAIL.COM
แผนที่ ที่ตั้งของอาคารของเรา

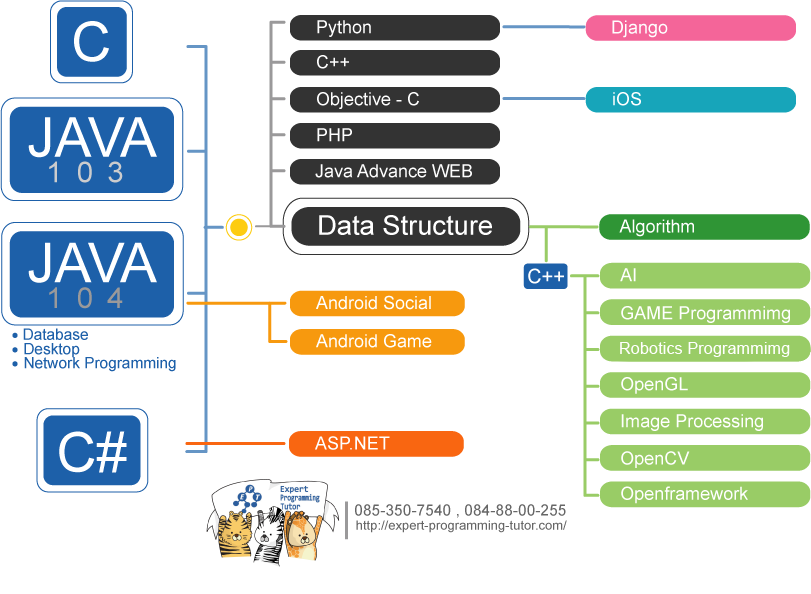
แผนผังการเรียนเขียนโปรแกรม

Link อื่นๆ

Allow sites to save and read cookie data.
Cookies are small pieces of data created by sites you visit. They make your online experience easier by saving browsing information. We use cookies to improve your experience on our website. By browsing this website, you agree to our use of cookies.

Copyright (c) 2013 expert-programming-tutor.com. All rights reserved. | 085-350-7540 | 084-88-00-255 | ntprintf@gmail.com

ติดต่อเราได้ที่

085-350-7540 (DTAC)
084-88-00-255 (AIS)
026-111-618
หรือทาง EMAIL: NTPRINTF@GMAIL.COM
แผนที่ ที่ตั้งของอาคารของเรา