สมัครเรียนโทร. 085-350-7540 , 084-88-00-255 , ntprintf@gmail.com

Spring

Spring Framework พื้นฐาน - Spring Framework คืออะไร Spring Framework พื้นฐาน - ความแตกต่างระหว่าง Spring และ Spring Boot Spring Framework พื้นฐาน - การติดตั้ง Spring Framework Spring Framework พื้นฐาน - การตั้งค่าโปรเจกต์ Spring ด้วย Maven/Gradle Spring Framework พื้นฐาน - IoC (Inversion of Control) คืออะไร Spring Framework พื้นฐาน - DI (Dependency Injection) คืออะไร Spring Framework พื้นฐาน - Bean ใน Spring คืออะไร Spring Framework พื้นฐาน - การสร้างและจัดการ Bean ใน Spring Spring Framework พื้นฐาน - การใช้ @Component และ @Service ในการสร้าง Bean Spring Framework พื้นฐาน - การใช้ @Autowired เพื่อ Inject Dependencies Spring Framework พื้นฐาน - การทำงานของ ApplicationContext ใน Spring Spring Framework พื้นฐาน - Bean Scope ใน Spring (Singleton, Prototype) Spring Framework พื้นฐาน - การใช้ @Configuration และ @Bean ใน Spring Spring Framework พื้นฐาน - การใช้ @Qualifier เพื่อเลือก Bean Spring Framework พื้นฐาน - การใช้ @Primary เพื่อกำหนด Bean หลัก Spring Framework พื้นฐาน - ความแตกต่างระหว่าง @Autowired และ @Resource Spring Framework พื้นฐาน - การทำงานกับ Property Files ใน Spring Spring Framework พื้นฐาน - การอ่านค่า Property ด้วย @Value Spring Framework พื้นฐาน - การใช้ @PropertySource เพื่อโหลดไฟล์ Property Spring Framework พื้นฐาน - การทำงานกับ Profiles ใน Spring (@Profile) Spring AOP - AOP ใน Spring คืออะไร Spring AOP - การใช้ @Aspect เพื่อสร้าง Aspect Spring AOP - การใช้ @Before เพื่อทำงานก่อนเมธอด Spring AOP - การใช้ @After เพื่อทำงานหลังเมธอด Spring AOP - การใช้ @Around เพื่อควบคุมการทำงานของเมธอด Spring AOP - การใช้ @AfterReturning เพื่อจัดการผลลัพธ์ที่คืนจากเมธอด Spring AOP - การใช้ Pointcut Expressions ใน AOP Spring AOP - การสร้าง Custom Annotations ด้วย AOP Spring AOP - การจัดการข้อยกเว้นใน AOP ด้วย @AfterThrowing Spring AOP - การใช้ Proxy ใน Spring AOP Spring Data Access - การทำงานกับ JDBC ใน Spring Spring Data Access - Spring JDBC Template คืออะไร Spring Data Access - การใช้ JDBC Template เพื่อรัน Query Spring Data Access - การเชื่อมต่อกับฐานข้อมูล MySQL ด้วย Spring JDBC Spring Data Access - การใช้ RowMapper เพื่อแมปผลลัพธ์จากฐานข้อมูล Spring Data Access - การทำ Transaction Management ใน Spring Spring Data Access - การใช้ @Transactional ในการจัดการทรานแซคชั่น Spring Data Access - การใช้ DataSource ใน Spring Spring Data Access - Spring ORM (Object-Relational Mapping) คืออะไร Spring Data Access - การเชื่อมต่อกับฐานข้อมูลด้วย Hibernate และ Spring Spring MVC - Spring MVC คืออะไร Spring MVC - การสร้าง Controller ใน Spring MVC ด้วย @Controller Spring MVC - การใช้ @RequestMapping เพื่อแมป URL Spring MVC - การใช้ @GetMapping และ @PostMapping Spring MVC - การรับค่าพารามิเตอร์จาก URL ด้วย @RequestParam Spring MVC - การใช้ @PathVariable เพื่อจับค่าจาก URL Spring MVC - การส่งข้อมูลกลับจาก Controller ด้วย @ResponseBody Spring MVC - การใช้ Model และ View ใน Spring MVC Spring MVC - การจัดการกับฟอร์มใน Spring MVC Spring MVC - การอัปโหลดไฟล์ด้วย Spring MVC Spring Boot พื้นฐาน - Spring Boot คืออะไร Spring Boot พื้นฐาน - การติดตั้ง Spring Boot CLI Spring Boot พื้นฐาน - การสร้างโปรเจกต์ Spring Boot ด้วย Spring Initializr Spring Boot พื้นฐาน - การทำงานของไฟล์ application.properties Spring Boot พื้นฐาน - การใช้ไฟล์ application.yml แทน application.properties Spring Boot พื้นฐาน - การรันแอปพลิเคชัน Spring Boot ด้วย mvn spring-boot:run Spring Boot พื้นฐาน - Auto Configuration ใน Spring Boot คืออะไร Spring Boot พื้นฐาน - การใช้ @SpringBootApplication Spring Boot พื้นฐาน - Spring Boot Starters คืออะไร Spring Boot พื้นฐาน - การใช้ DevTools ใน Spring Boot สำหรับ Hot Reload Spring Boot Web Application - การสร้าง REST API ด้วย Spring Boot Spring Boot Web Application - การสร้าง Controller ใน Spring Boot Spring Boot Web Application - การจัดการกับ HTTP GET และ POST ใน Spring Boot Spring Boot Web Application - การใช้ @RestController ในการสร้าง REST API Spring Boot Web Application - การใช้ @RequestMapping และ @GetMapping ใน Spring Boot Spring Boot Web Application - การส่ง Response ด้วย JSON ใน Spring Boot Spring Boot Web Application - การใช้ @RequestBody เพื่อรับข้อมูล JSON Spring Boot Web Application - การใช้ @PathVariable ใน Spring Boot Spring Boot Web Application - การรับค่าจาก Query Parameters ด้วย @RequestParam Spring Boot Web Application - การจัดการ Error Handling ใน Spring Boot REST API Spring Boot Data Access - การใช้ Spring Data JPA กับ Spring Boot Spring Boot Data Access - การตั้งค่า DataSource ใน Spring Boot Spring Boot Data Access - การเชื่อมต่อฐานข้อมูล MySQL ใน Spring Boot Spring Boot Data Access - การใช้ @Entity และ @Table เพื่อสร้าง Entity ใน JPA Spring Boot Data Access - การใช้ @Id และ @GeneratedValue ในการสร้าง Primary Key Spring Boot Data Access - การสร้าง Repository ด้วย JpaRepository Spring Boot Data Access - การใช้ @Query เพื่อสร้าง Custom Queries Spring Boot Data Access - การจัดการ One-to-Many Relationships ใน JPA Spring Boot Data Access - การจัดการ Many-to-Many Relationships ใน JPA Spring Boot Data Access - การใช้ Spring Boot กับ H2 Database สำหรับการทดสอบ Spring Security - Spring Security คืออะไร Spring Security - การเพิ่ม Spring Security ในโปรเจกต์ Spring Security - การกำหนด Basic Authentication ด้วย Spring Security Spring Security - การกำหนด Role และ Permissions ใน Spring Security Spring Security - การใช้ Custom Login Page ใน Spring Security Spring Security - การใช้ JWT (JSON Web Token) ใน Spring Security Spring Security - การทำ OAuth2 Authentication ใน Spring Boot Spring Security - การใช้ Security Filters ใน Spring Security Spring Security - การจัดการกับ CSRF (Cross-Site Request Forgery) ใน Spring Security Spring Security - การใช้ BCrypt ในการเข้ารหัสรหัสผ่าน Spring Boot การทดสอบและการจัดการอื่น ๆ - การเขียน Unit Test ด้วย JUnit ใน Spring Boot Spring Boot การทดสอบและการจัดการอื่น ๆ - การเขียน Integration Test ใน Spring Boot Spring Boot การทดสอบและการจัดการอื่น ๆ - การใช้ Spring Boot Test เพื่อทดสอบ REST API Spring Boot การทดสอบและการจัดการอื่น ๆ - การใช้ MockMVC เพื่อทดสอบ Controller Spring Boot การทดสอบและการจัดการอื่น ๆ - การทำ Logging ใน Spring Boot ด้วย SLF4J Spring Boot การทดสอบและการจัดการอื่น ๆ - การใช้ Actuator ใน Spring Boot เพื่อตรวจสอบสถานะของแอปพลิเคชัน Spring Boot การทดสอบและการจัดการอื่น ๆ - การตั้งค่า Health Check Endpoint ด้วย Spring Boot Actuator Spring Boot การทดสอบและการจัดการอื่น ๆ - การใช้งาน Spring Boot Admin เพื่อจัดการแอปพลิเคชัน Spring Boot การทดสอบและการจัดการอื่น ๆ - การทำงานกับ Microservices ด้วย Spring Cloud Spring Boot การทดสอบและการจัดการอื่น ๆ - การใช้ Spring Boot กับ Docker

Spring Framework พื้นฐาน - การใช้ @Autowired เพื่อ Inject Dependencies


Spring Framework ถือเป็นหนึ่งใน framework ที่ได้รับความนิยมมากที่สุดในโลกของการพัฒนา Application ด้วย Java ด้วยความยืดหยุ่นและความสามารถในการจัดการกับ dependencies ต่างๆ ได้อย่างมีประสิทธิภาพ เทคโนโลยีนี้ถูกพัฒนาขึ้นเพื่อทำให้การเขียนโปรแกรมมีความง่ายดายยิ่งขึ้น โดยเฉพาะอย่างยิ่งเมื่อพูดถึงการจัดการ dependencies ซึ่งเราสามารถใช้ annotation อย่าง @Autowired เพื่อ Inject Dependencies ได้อย่างมีประสิทธิภาพ


Dependency Injection คืออะไร?

ก่อนที่เราจะพูดถึง @Autowired เราควรมีความเข้าใจเกี่ยวกับ Dependency Injection (DI) เสียก่อน ในสรุปง่ายๆ DI คือกระบวนการที่เราส่ง dependencies ให้กับวัตถุ (object) โดยไม่จำเป็นต้องมีการกำหนดค่า dependencies นั้นๆ ภายในวัตถุเอง หมายความว่าวัตถุไม่ต้องรู้ล่วงหน้าว่าจะต้องขึ้นอยู่กับ dependencies ใดหรือมีวิธีการสร้าง และส่งเสริมให้เกิด loose coupling ทำให้เราสามารถแก้ไข ทดสอบ หรือปรับเปลี่ยนโปรแกรมของเราได้ง่ายขึ้น


@Autowired คืออะไร?

@Autowiried เป็น annotation ที่ใช้บอก Spring ว่าเราต้องการให้ Spring Inject Dependencies ให้กับ field, constructor, หรือ setter method ที่กำหนดไว้ โดยที่เราไม่ต้องทำการ new object ขึ้นเอง ซึ่งทำให้การจัดการหรือเปลี่ยนแปลง dependency ของ object เหล่านั้นง่ายขึ้น


วิธีการใช้ @Autowired

1. Field Injection


    import org.springframework.beans.factory.annotation.Autowired;
    import org.springframework.stereotype.Component;

    @Component
    public class TextEditor {

        @Autowired
        private SpellChecker spellChecker;

        public void spellCheck() {
            spellChecker.checkSpelling();
        }
    }

ในตัวอย่างนี้เราใช้งาน @Autowired เพื่อทำการ inject ตัวแปรของ class SpellChecker เข้ามาใน TextEditor โดยที่เราไม่ต้องใช้ `new SpellChecker()` ใน class TextEditor

2. Constructor Injection

การใช้ constructor injection จะมีประโยชน์มากในการสร้าง immutability สำหรับออบเจ็กต์ ทำให้ dependencies ถูกรับไว้อย่างปลอดภัยตั้งแต่เริ่มต้น


    import org.springframework.beans.factory.annotation.Autowired;
    import org.springframework.stereotype.Component;

    @Component
    public class TextEditor {

        private SpellChecker spellChecker;

        @Autowired
        public TextEditor(SpellChecker spellChecker) {
            this.spellChecker = spellChecker;
        }

        public void spellCheck() {
            spellChecker.checkSpelling();
        }
    }

ด้วย @Autowired บน constructor ทำให้ Spring เข้าใจว่าเมื่อสร้าง TextEditor ให้ spring ทำการ inject SpellChecker ที่ต้องการอัตโนมัติ

3. Setter Method Injection


    import org.springframework.beans.factory.annotation.Autowired;
    import org.springframework.stereotype.Component;

    @Component
    public class TextEditor {

        private SpellChecker spellChecker;

        @Autowired
        public void setSpellChecker(SpellChecker spellChecker) {
            this.spellChecker = spellChecker;
        }

        public void spellCheck() {
            spellChecker.checkSpelling();
        }
    }

Setter Injection จะคล้ายกับ Field Injection แต่จะใช้สำหรับกรณีที่เราต้องการให้มีการตั้งค่า dependencies หลัง object ถูกสร้างขึ้นแล้ว


Usecase และสถานการณ์ที่ควรใช้ @Autowired

@Autowire นั้นถูกใช้อย่างกว้างขวางใน Application ที่มีการพัฒนาโดยใช้ Spring Framework โดยเฉพาะในระบบที่มีการจัดการ dependencies จำนวนมาก เช่น ระบบ CRM หรือระบบ e-commerce ขนาดใหญ่ ที่มีหลายโมดูลที่ต้องการความคลาดเคลื่อนและการบำรุงรักษาง่าย


ข้อดีและข้อจำกัดของการใช้ @Autowired

- ข้อดี:

- ลดความซับซ้อนในการเขียนโค้ด

- ลดความจำเป็นในการใช้โค้ด hard-coded

- ส่งเสริมการทดสอบแยกและการพัฒนา

- ข้อจำกัด:

- การใช้ field injection มักทำให้ testing ทำได้ยากขึ้น ควรหลีกเลี่ยงใช้ในกรณีที่ไม่จำเป็น

- มีความจำเป็นต้องทำความเข้าใจกับ container ที่ Spring ใช้จัดการขอบเขตของ object


บทสรุป

การใช้ @Autowired ใน Spring ช่วยลดภาระในการจัดการกับ dependencies ภายใน Application ทำให้ระบบมีคุณสมบัติที่สามารถบำรุงรักษาได้ง่าย และยืดหยุ่นในการเปลี่ยนแปลงกับความต้องการที่เปลี่ยนไป หากคุณสนใจที่จะขยายความรู้เพิ่มเติมเกี่ยวกับ Spring Framework หรือการพัฒนาโปรแกรมในทางปฏิบัติ สามารถลองมาศึกษาเพิ่มเติมจากแหล่งเรียนรู้ต่างๆ เช่น การสมัครเรียนที่สถานศึกษาที่มีหลักสูตรเกี่ยวกับการเขียนโปรแกรมเชิงลึกอย่าง EPT ที่จะช่วยเสริมสร้างความชำนาญด้านการเขียนโปรแกรมแก่คุณอย่างครบถ้วน.

เรียนรู้การใช้ @Autowired ไม่ได้แค่ช่วยให้โค้ดของคุณดูสะอาดและเข้าใจง่ายขึ้น แต่ยังช่วยทำให้โครงสร้างของ application มีความมีเสถียรภาพและขยายขอบเขตได้ในทันทีที่มีความจำเป็นต้องทำการปรับเปลี่ยนในระยะยาว


หมายเหตุ: ข้อมูลในบทความนี้อาจจะผิด โปรดตรวจสอบความถูกต้องของบทความอีกครั้งหนึ่ง บทความนี้ไม่สามารถนำไปใช้อ้างอิงใด ๆ ได้ ทาง EPT ไม่ขอยืนยันความถูกต้อง และไม่ขอรับผิดชอบต่อความเสียหายใดที่เกิดจากบทความชุดนี้ทั้งทางทรัพย์สิน ร่างกาย หรือจิตใจของผู้อ่านและผู้เกี่ยวข้อง

หากเจอข้อผิดพลาด หรือต้องการพูดคุย ติดต่อได้ที่ https://m.me/expert.Programming.Tutor/


Tag ที่น่าสนใจ: java c# vb.net python c c++ machine_learning web database oop cloud aws ios android


บทความนี้อาจจะมีที่ผิด กรุณาตรวจสอบก่อนใช้

หากมีข้อผิดพลาด/ต้องการพูดคุยเพิ่มเติมเกี่ยวกับบทความนี้ กรุณาแจ้งที่ http://m.me/Expert.Programming.Tutor

ไม่อยากอ่าน Tutorial อยากมาเรียนเลยทำอย่างไร?

สมัครเรียน ONLINE ได้ทันทีที่ https://elearn.expert-programming-tutor.com

หรือติดต่อ

085-350-7540 (DTAC)
084-88-00-255 (AIS)
026-111-618
หรือทาง EMAIL: NTPRINTF@GMAIL.COM
แผนที่ ที่ตั้งของอาคารของเรา

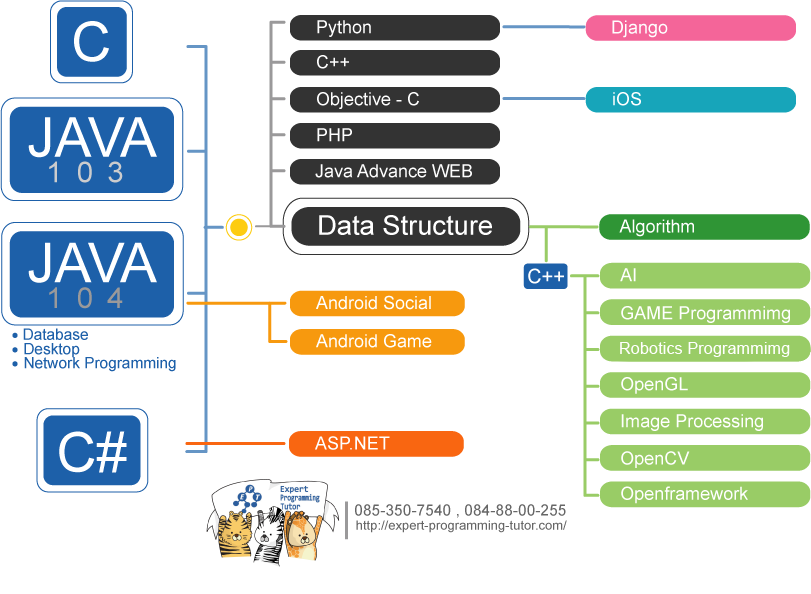
แผนผังการเรียนเขียนโปรแกรม

Link อื่นๆ

Allow sites to save and read cookie data.
Cookies are small pieces of data created by sites you visit. They make your online experience easier by saving browsing information. We use cookies to improve your experience on our website. By browsing this website, you agree to our use of cookies.

Copyright (c) 2013 expert-programming-tutor.com. All rights reserved. | 085-350-7540 | 084-88-00-255 | ntprintf@gmail.com

ติดต่อเราได้ที่

085-350-7540 (DTAC)
084-88-00-255 (AIS)
026-111-618
หรือทาง EMAIL: NTPRINTF@GMAIL.COM
แผนที่ ที่ตั้งของอาคารของเรา